

Ive had some free time and spare income recently, so I thought I would yet again expand my hobby repertoire. Ive seen alot of videos by Punished Props in the past, but ive always been intimidated by the lengthy and diverse processes required to get to a final product. However, with my newfound proceeds and oodles of time I thought I should just get stuck in and see what happens. I will try to document the process I took as an absolute beginner so you can follow along aswell 🙂
Step 1: Concept and Research
My biggest flaw when it comes to making things is my adversity to research and tendency to just “wing it”. Now granted this works to an extent when learning things like software, but in creative projects, it tends to fall flat.
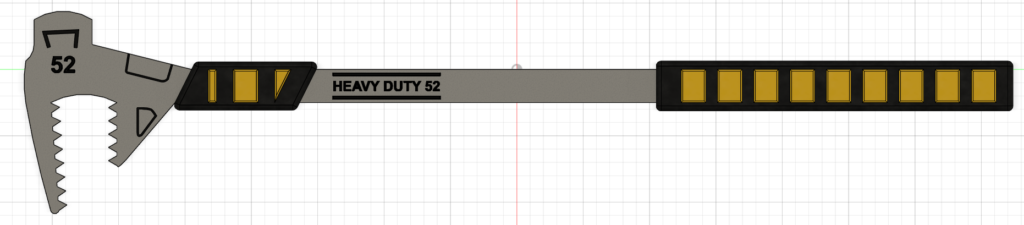
I decided pretty early on what I wanted to bring to life in the form of a model. I had always loved the game WatchDogs, and in particular, the gritty engineer character Raymond Kenney. Kenney carries around an oversized pipe wrench as his weapon throughout the game, and I thought it would be cool (and relatively easy) to make in real life.

When doing my research, I came across multiple methods of producing props similar to this. The most common method seemed to be using a material known as EVA foam. Making the prop out of EVA foam would require me to model it in the same way as if I was 3D printing it, but then print out the dimensions on 2D paper to use as a template for cutting the foam parts. I tested with some other foam I had lying around, and found that working with the material with my limited tools and skills was a NIGHTMARE! I decided pretty early on that I did not want to deal with the hassle of foam.
So what else could I use? Well during the research stage I was actually working on a completely different cosplay project using 3D printed PLA that was then sanded and painted. I realised that it would be best to stick to what I already knew how to do (and had materials on hand for). Now, thats not to say I was doing perfectly great with the other cosplay project, as remember, I was new to this in its entirety, but I atleast knew how to produce the parts easily!
Step 2: 3D Modelling
If youve seen any of my other posts or 3D models, youll know I am a HUGE fan of Autodesk Fusion 360. For everyone from the average hobbyist to skilled creators, Fusion 360 works wonders! The best part is, its also completely free (albeit with reduced features) to anybody using it for non commercial projectsI One day I will make a full tutorial on how to use the wonderful Fusion, but for now I will outline my basic process.
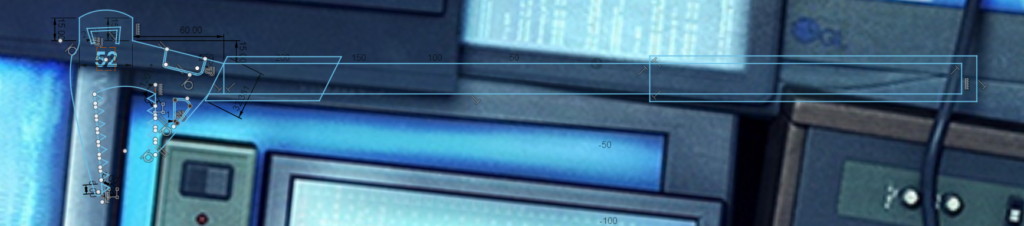
First, I prepare a reference image. Fusion allows you to scale an image with real dimensions based on a known length, so an image with your item flat on alongside a measurable length is preffered. If you cant get an image of your item with a measurable length, atleast try to get it flat on. If you cant do that either, well, its guesswork for you unfortunately.

Depending on your desired accuracy, you can either set your scale based on the prop or an object in the photo. I started with using Kenneys height, but quickly switched to using the monitors dimensions as it produced a scale below “insane” (the wrench was almost 70cm long!). Using the “edit canvas” and “calibrate” tools properly here is key.

The rest of the process is now akin to a standard 3D model. All the hard work wouldve been done by the devs, and now you just have to trace the image with a sketch to get a relatively accurate replica. I tend to take some creative liberty and round some measurements to more sensible numbers, but I tend to find a model that looks good to the eye already has pretty sensible and round measurements!
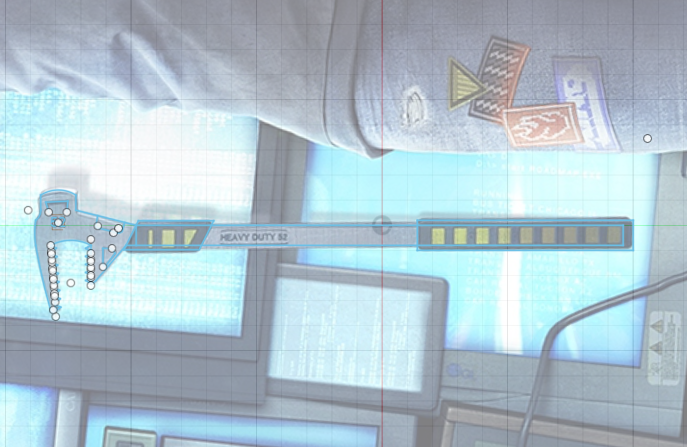
Im not going to go in depth of the full process, but by the end, you should have a pretty good replica of the item in its full form ready for making!
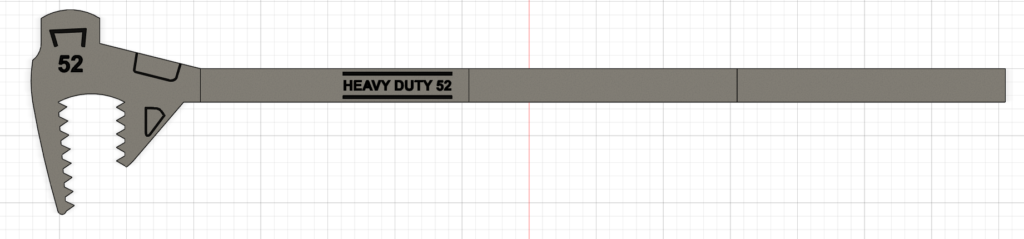
Now we have the hard part of taking this object measuring almost 80cm and bringing it to real life. My process usually involves taking the model and splitting it into equal parts logically. This will differ between models, but a good rule of thumb is to produce pieces with flat surfaces and unbroken complex geometry. For example, a poor split will result in parts like the head or text being split in two, which will be noticable and hard to hide in the final piece. My model ended up breaking pretty nicely into 6 parts; the head, the text shaft, two plain shafts, and two rubber handle pieces.
Step 3: Printing The Model
Now that we have a 3D model ready to print, we just have to, well, print it! I wont go in depth on the best printers, settings, or filaments, but I reccomend printing at a mid quality with a high durability filament such as PETG. Each part should fit on the bed of even small printers, and shouldnt take no more than 1hr 30min and 90grams to print. This stage is pretty familiar if youve used 3D printers before and is probably the easiest by far. Once printed the wrench can be glued together using a simple cyanoacrylate based super glue. Next we will finish the 3D print with sanding, filling, priming, and painting (but youll have to wait for the second in depth blog post for that!).
Step 4: See The Next Post
As of writing I havent actually finished this, so youll have to wait for the next part where I show the process. I do have another project ongoing with a similar process, so you may see hints of it early! Consider subscribing at the bottom of the page if youre interested 🙂
One response to “Cosplay As A Beginner: My First Try”
The article is a comprehensive guide to all things EVA Foam.